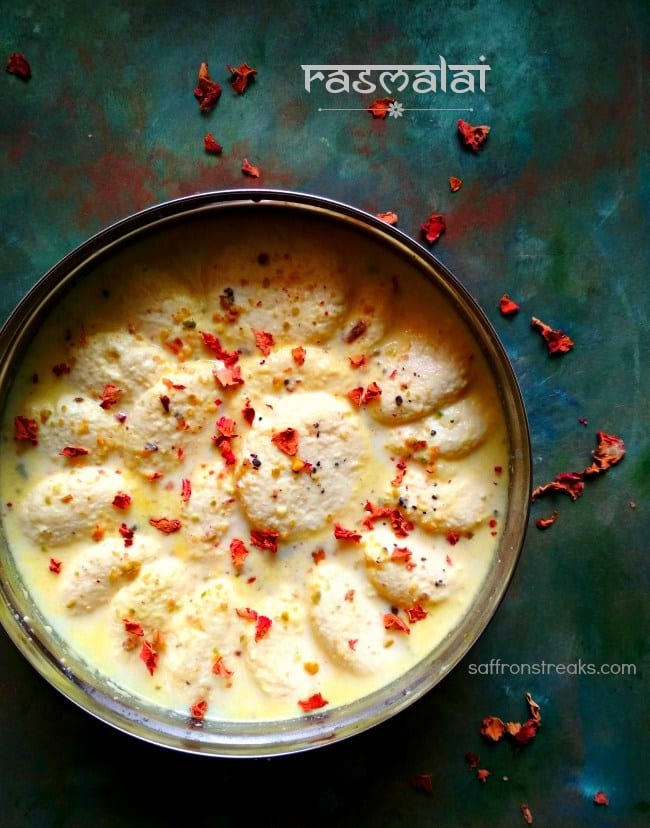
Bengali Dessert: Homemade Kesar Pista Rasmalai
Read Time:15 Minute, 22 Second
Rasmalai is nothing but an extension of bengal’s famous spongy rasgulla, served with rabdi or thickened milk as per the local preferences goes.
Rasmalai – another jewel of sweet from the vast repertoire of Bengali sweets. Though in Bengal, rasmalais usually looks quite different from the hugely popular North Indian varieties which is ubiquitously present in every corner of the country, the method of preparation is quite similar though.
Rasmalai is nothing but an extension of bengal’s famous spongy rasgulla, served with rabdi or thickened milk as per the local preferences goes. In short, preparation and learning to make super soft and spongy rasmalai starts with perfecting the rasgulla recipe itself.
However, few pointers to make super soft, halwai / sweet-maker style rasmalais are as follows –
1. The base chhena – like rasgulla too, rasmalai also needs super soft chhena, not crumbly one. And it all starts with how good your milk is. Always use full cream fresh milk for the recipe.
How to curdle the milk properly, there are lots of things to consider while doing it and I have covered all the points in detail in my previous rasgulla post for step by step pictures so kindly refer it for the details. Writing them again would be repetition of the same.
2. The shape of the rasmalai – usually in Bengal, rasmalais are round shape, just like the rasgullas. Sometimes slightly flattened but overall, they are slightly smaller than the regular rasgulla size. But in north India and elsewhere, rasmalais are usually flat disc shaped.
Preparing that shape is quite easy but it needs little bit of patience too. Just don’t rush into doing it. Take your own sweet time and shape it with patience. Since we are dealing with soft chhena here, so shape the rasmalais very carefully. Take a walnut size chhena dough in your hand and keep it between your palm, press gently only once to flatten it. You will observe that while doing so, it has developed few cracks over the edges, try to cover that by rubbing your finger gently. Do it with very light hand.
3. The secret of making super soft, melt in mouth kinda rasmalai –
As I told you before, rasmalai is just an extension of rasgulla recipe. Timing is all that matters here too. If your rasgullas need 12 minute to get cooked completely, cook the rasmalai in sugar syrup for just 10 minute.
There are two ways of doing it –
Few people do not like to boil the rasmalai in milk, hence they need to cook the rasmalai balls for the given time, say 12 minute here.
But I do it little differently, as learned from my mom. Boiling the rasmalai balls in milk for 30-40 seconds always gives melt in mouth kinda rasmalai. Better than the store bought rasmalais.
See Also

Blackberry Nectarine Crisp
So, if you are following my procedures, cook the rasmalai two minutes earlier than it is required.
Once done, immediately remove the rasmalais from the hot sugar syrup and dunk them in bowl of cold water.
If you are making rasmalai in small batch, say 10 -12 rasmalai, you can skip this process.
Or if you are making rasmalais in large batches, like me, say 100 or so then keep it in mind to dunk them in bowl of cold water.
Yes, 100 rasmalai in one go, I know the number is quite mind boggling and that is because, I do sell rasgullas and rasmalais from my home. If you are in Bangalore and like to place your orders, please send me a message on my FB page or Instagram page.
.tasty-recipes-print-button{background-color:#667;border:none;display:inline-block;padding:.5em 1em;text-decoration:none}body:not(.tasty-recipes-print-view) .tasty-recipes-print-button.tasty-recipes-print-above-card{color:#fff;display:none}body:not(.tasty-recipes-print-view) .tasty-recipes-print-button.tasty-recipes-print-above-card:hover{background-color:#b2b2bb;color:#fff;display:inline-block;padding:.5em 1em;text-decoration:none}.tasty-recipes-image-button-container{display:flex;flex-direction:column;flex-wrap:wrap;float:right;margin-left:10px}body.tasty-recipes-print-view .tasty-recipes-buttons{display:none}.tasty-recipes-image-button-container .tasty-recipes-buttons{margin-bottom:10px;margin-top:10px}.tasty-recipes-image-button-container .tasty-recipes-button-wrap{box-sizing:border-box;margin-bottom:10px}.tasty-recipes-image-button-container .tasty-recipes-buttons a{background-color:#f9f9f9;border:1px solid #aaa;border-radius:0;color:#aaa;display:block;font-size:16px;font-weight:700;line-height:16px;margin-top:0;padding:8px;text-align:center;text-decoration:none;text-transform:uppercase}.tasty-recipes-image-button-container .tasty-recipes-buttons .button:hover{background-color:#aaa;border:1px solid #aaa;color:#fff;opacity:1}.tasty-recipes-image-button-container .tasty-recipes-buttons a:hover{background-color:#979599;text-decoration:none}.tasty-recipes-image-button-container .tasty-recipes-buttons svg{display:none}.tasty-recipes-yield-scale{border:1px solid #979599;border-radius:2px;color:#979599;font-size:.7rem;margin-left:3px;padding:0 4px}.tasty-recipes-units-scale-container{display:flex;flex-wrap:wrap}.tasty-recipes-convert-container{padding:0 1em 1em 0}.tasty-recipes-convert-container .tasty-recipes-convert-label{align-self:center;color:#979599;font-size:.6rem;text-transform:uppercase}.tasty-recipes-convert-container button{background:transparent;border:1px solid #353547;border-radius:2px;color:#353547;letter-spacing:0;margin-left:5px;min-width:34px;padding:2px 4px;text-align:center}.tasty-recipes-convert-container button.tasty-recipes-convert-button-active{background-color:#000;border-color:#000;color:#fff}.tasty-recipes-convert-container button:focus{outline:none}.tasty-recipes-scale-container{display:flex;padding:0 0 1em}.tasty-recipes-scale-container .tasty-recipes-scale-label{align-self:center;color:#979599;font-size:.6rem;text-transform:uppercase}.tasty-recipes-scale-container button{background:transparent;border:1px solid #353547;border-radius:2px;color:#353547;letter-spacing:0;margin-left:5px;min-width:34px;padding:2px 4px}.tasty-recipes-scale-container button.tasty-recipes-scale-button-active{background-color:#000;border-color:#000;color:#fff}.tasty-recipes-scale-container button:focus{outline:none}.tasty-recipes-ingredients-header{margin:1em 0}@media only screen and (min-width:520px){.tasty-recipes-ingredients-header{align-items:center;display:flex;flex-wrap:wrap;justify-content:space-between}}.tasty-recipes-ingredients-header .tasty-recipes-ingredients-clipboard-container{align-items:baseline;display:inline-flex}.tasty-recipes-ingredients-header h3{margin:0 10px 10px 0}.tasty-recipes-ingredients-clipboard-container .tasty-recipes-copy-button{background:transparent;border:none;color:#353547;height:24px;padding:0;position:relative;width:24px}.tasty-recipes-ingredients-clipboard-container .tasty-recipes-copy-button:hover{opacity:.5}.tasty-recipes-instructions-header{align-items:baseline;display:flex;flex-wrap:wrap;justify-content:space-between;margin:1em 0}.tasty-recipes-entry-content .tasty-recipes-instructions h3{margin:0 0 1rem}@media only screen and (min-width:520px){.tasty-recipes-entry-content .tasty-recipes-instructions h3{margin:0}}button[name=tasty-recipes-video-toggle]{background:#979599;border:#979599;border-radius:2px;display:inline-block;font-size:14px;height:30px;line-height:20px;margin:0;padding:0;text-align:center;vertical-align:middle;width:86px}button[name=tasty-recipes-video-toggle] span{padding:0 4px;pointer-events:none}button[name=tasty-recipes-video-toggle][aria-checked=false] :last-child,button[name=tasty-recipes-video-toggle][aria-checked=true] :first-child{background:#fff;border-radius:2px;color:#979599;padding:2px 4px}button[name=tasty-recipes-video-toggle][aria-checked=false] :first-child,button[name=tasty-recipes-video-toggle][aria-checked=true] :last-child{color:#fff}label[for=tasty-recipes-video-toggle]{color:#979599;font-size:.6rem;line-height:30px;padding-right:8px;text-transform:uppercase;user-select:none;-moz-user-select:none;-ms-user-select:none;-webkit-user-select:none;-o-user-select:none;vertical-align:middle}.tasty-recipe-responsive-iframe-container{margin:10px 0}.tasty-recipes-equipment{display:flex;flex-wrap:wrap;justify-content:space-evenly}.tasty-recipes-equipment>h3{flex:0 0 100%}.tasty-recipes-equipment .tasty-link-card{flex:0 0 50%;padding:1.5rem 1rem;text-align:center}@media screen and (min-width:500px){.tasty-recipes-equipment .tasty-link-card{flex:0 0 33%}}.tasty-recipes-equipment .tasty-link-card p{font-size:1em;font-weight:700;margin-bottom:0}.tasty-recipes-equipment .tasty-link-card p a{color:initial}.tasty-recipes-equipment .tasty-link-card span{font-size:.9em}.tasty-recipes .tasty-recipes-nutrition ul{list-style-type:none;margin:0;padding:0}.tasty-recipes .tasty-recipes-nutrition ul:after{clear:both;content:\” \”;display:block}.tasty-recipes .tasty-recipes-nutrition li{float:left;list-style-type:none;margin-bottom:0;margin-left:0;margin-right:16px}.tasty-recipes-plug{align-items:center;display:flex;flex-wrap:wrap;justify-content:center;margin-bottom:1em;text-align:center}.tasty-recipes-plug a{box-shadow:none;text-decoration:none}.tasty-recipes-plug a img{display:inline-block;height:auto;margin:5px 0 0 8px;width:150px}.tasty-recipes-footer-content{padding:1.5em;text-align:center}.tasty-recipes-footer-content .tasty-recipes-footer-copy{margin-left:0}.tasty-recipes-footer-content img,.tasty-recipes-footer-content svg{width:60px}.tasty-recipes-entry-content .tasty-recipes-entry-footer h3{font-size:1.25em;margin:0 0 .25em;padding:0}.tasty-recipes-entry-footer p{font-size:.75em;margin:0}.tasty-recipes-entry-footer p a{border-bottom:none;box-shadow:none;text-decoration:underline}.tasty-recipes-flash-message{background-color:#fff;border-radius:4px;box-shadow:0 .3px .4px 0 rgba(0,0,0,.024),0 .9px 1.5px 0 rgba(0,0,0,.05),0 3.5px 6px 0 rgba(0,0,0,.1);color:#313135;display:inline-block;font-size:13px;letter-spacing:0;line-height:1.2em;margin-left:10px;padding:4px 10px}@media screen and (min-width:500px){.tasty-recipes-flash-message{padding:4px 10px}}.tasty-recipes-flash-message p{margin:0;padding:0;text-transform:none}@media screen and (min-width:500px){.tasty-recipes-footer-content{align-items:center;display:flex;justify-content:center;padding:1.5em 0;text-align:left}.tasty-recipes-footer-content .tasty-recipes-footer-copy{margin-left:.8em}}@media print{.tasty-recipes-no-print,.tasty-recipes-no-print *{display:none!important}}[data-tr-ingredient-checkbox]{cursor:pointer;list-style-position:outside;list-style-type:none!important;margin-left:0!important}[data-tr-ingredient-checkbox] .tr-ingredient-checkbox-container{position:relative}[data-tr-ingredient-checkbox] .tr-ingredient-checkbox-container input[type=checkbox]+label{display:inline-block;position:relative;vertical-align:middle}[data-tr-ingredient-checkbox] .tr-ingredient-checkbox-container input[type=checkbox]{clip:rect(1px 1px 1px 1px);clip:rect(1px,1px,1px,1px);height:1px;overflow:hidden;position:absolute!important;width:1px}[data-tr-ingredient-checkbox] .tr-ingredient-checkbox-container input[type=checkbox]+label:before{border:1px solid;border-radius:2px;content:\”\”;display:inline-block;height:20px;margin-right:10px;position:relative;width:20px}[data-tr-ingredient-checkbox] .tr-ingredient-checkbox-container input[type=checkbox]:checked+label:after{border-bottom:2px solid;border-left:2px solid;content:\”\”;display:inline-block;height:6px;left:4px;position:absolute;top:4px;transform:rotate(-45deg);width:12px}[data-tr-ingredient-checkbox] .tr-ingredient-checkbox-container input[type=checkbox]:focus+label:before{box-shadow:0 0 8px #5e9ed6;outline:1px solid #5d9dd5}[data-tr-ingredient-checkbox=checked]{opacity:.8;text-decoration:line-through}/* Tasty Recipes Elegant recipe card styles */ .tasty-recipes-display{border:0.15em solid;border-color:#fff;padding:1.5em;outline:.5em solid #f9f9f9;background:#f9f9f9;margin-bottom:1em}.tasty-recipes-plug{margin-bottom:1em}.tasty-recipes-display h2{font-weight:400;text-transform:uppercase;margin-top:0;padding-top:0}.tasty-recipes-rating .rating-label{font-size:0.8em;font-style:italic}.tasty-recipes-rating p{margin-bottom:1rem;margin-right:0.8rem;display:inline-block}.tasty-recipes-details{font-size:0.8em}.tasty-recipes-details ul li{list-style-type:none;display:inline-block;width:30%}.tasty-recipes-description p{font-size:.8em;font-style:italic}.tasty-recipe-ingredients h3,.tasty-recipes-ingredients h3,.tasty-recipe-instructions h3,.tasty-recipes-instructions h3,.tasty-recipes-equipment h3,.tasty-recipes-notes h3{font-weight:normal;margin-top:0.6em;margin-bottom:1.2em;text-transform:uppercase}.tasty-recipe-video-embed~.tasty-recipes-equipment{padding-top:1em}.tasty-recipes-notes{margin-bottom:1rem}.tasty-recipes-notes h3{font-size:1.2em}.tasty-recipes-notes p,.tasty-recipes-notes ul{font-size:0.8em}.tasty-recipes-nutrition h3{font-size:1em;text-align:center;margin-top:1em}.tasty-recipes-nutrition{padding:0.5em;border-top:.15em solid #fff}.tasty-recipes-nutrition ul li{list-style-type:none;font-size:0.8em;margin-left:0}@media only screen and (min-width:520px){.tasty-recipes-nutrition ul li{width:30%}}.tasty-recipes-keywords p{font-size:.8em;margin-top:1em;margin-bottom:1em}.tasty-recipes-entry-footer{text-align:center;padding-top:1rem}.tasty-recipes-print .tasty-recipes-details ul{padding-left:0}/*Print view styles*/ .tasty-recipes-print-view{font-size:11px;line-height:1.5em}.tasty-recipes-print-view .tasty-recipes-description p,.tasty-recipes-print-view .tasty-recipes-details,.tasty-recipes-print-view .tasty-recipes-notes p,.tasty-recipes-print-view .tasty-recipes-notes ul,.tasty-recipes-print-view .tasty-recipes-nutrition ul li{font-size:1em}.tasty-recipes-print-view h3{letter-spacing:0.1em;text-transform:uppercase}.tasty-recipes-print-view .tasty-recipes-nutrition{padding:0}.tasty-recipes-print-view .tasty-recipes-nutrition h3{text-align:left;font-size:1.2em;font-weight:normal}
Bengali Dessert: Homemade Kesar Pista Rasmalai
Print Recipe
Pin Recipe
- Prep Time: 6 hours
- Cook Time: 40 minutes
- Total Time: 6 hours 40 minutes
- Yield: 18
- Category: Dessert
Ingredients
For Chenna
- Pure cow’s fresh Milk (with fat content 3-4 %, no toned and homogenized ones : 2 litre)
- Vinegar (white : 3 tbsp diluted in one cup of water / alternately lemon juice diluted in water)
- Cornflour : 1 tsp (leveled up)
For Sugar Syrup
- Sugar : 1 cup (industry standard liquid measuring cups, do not use your tea cups)
- Water : 7 cups (using the same measuring cup)
For Rabdi / thickened milk
- Milk full fat fresh milk : 1 litre (for thick rabdi you will need 1.5 l milk)
- Sugar : ¾ cup (depending upon the sweetness of the sugar I am using)
- Kesar : few strands
- Pistachios : 2 tbsp chopped finely
- Rose essence : few drops (optional)
Instructions
For Rasmalai balls
- Boil the milk . Switch off the heat. Curdle the milk by slowly adding the souring agent.
- Stir properly after adding the souring agent. Go slowly and if it didnt curdle well, add little more.
- The chhenna curds will coagulate and separate from the greenish whey.
- Strain the chenna in a soft cotton cloth. Wash the warm chenna under running cold tap water.
- It will keep the chenna remain soft.
- Tied it nicely and hang the chenna for 3-4 hours or more.
- I usually prepare the chenna at night and hang it overnight. Next day morning I prepare the rasgullas.
- In a wide open mouthed vessel, (I use a flat bottom kadhai) dissolve the sugar in water.
- Bring it to the boil.
- I use one cup sugar and seven cup water ratio.
- This will take some time, so meanwhile knead the chenna with the help of your hand’s knuckle and heels of your palms.
- Chenna will slowly change its texture from soft granular curds to fine textures.
- Sprinkle cornflour , if using and knead it gently.
- Stop kneading the chenna when your hands are greasy enough.
- Make 18 balls out of it.
- Take one ball between your palm, press it once gently to flatten it. Gently rub your fingers along the edges to smooth out the visible cracks. Fine cracks are okay.
- Drop the rasmalai balls in rapidly boiling sugar syrup one by one.
- My vessel could hold upto 9 rasmalai balls in one go. Keep the remaining rasmalai balls covered with a moist cloth.
- Cook the rasmalai balls on medium heat for 5-6 minutes, covered. Open the lid, splash cold water, cover and cook for another 6 minute.
- By this time, you will observe that rasmalai balls has flattened enough and double in size.
- Keep a vessel of cold water ready nearby.
- Switch off the heat after cooking the rasmalai for 12 minute.
- Gently take out one rasmalai ball from the hot syrup with the help of flat ladle.
- Put the rasmalai balls between two flat ladles, and press gently to squeeze out the sugar syrup.
- This will help to soak the milk properly.
- Put that into the bowl of cold water.
- Repeat the steps with all the cooked rasmalai.
Rabdi / Thickened milk
- It is best to make ahead the rabdi and it will save lots of time.
- Boil the milk in heavy bottom pan and reduce it to ?rd of its quantity.
- From 2 litre milk, you will get around 700 ml reduced milk. You can thickened little more as per your preferences.
- Lower the heat and add the sugar and keep stirring. Adjust the sweetness accordingly.
Making Rasmalai
- Keep the milk warm on low heat.
- Take four rasmalai out of the bowl of cold water. Squeeze them gently and slide them very gently in the pan of rabdi milk.
- Let them cook in the milk for 30-40 second max.
- Do not overcrowd the milk pan with the rasmalais. My milk vessel can hold upto 4 rasmalai comfortably in one go
- Very carefully take out the rasmalai one by one with the help of flat ladle (like rice serving spoon) and place it gently in a flat container.
- Remember, rasmalais at this stage will be extremely fragile, so handle them very carefully.
- Repeat the steps for the remaining rasmalai.
- Please note do not over boil the rasmalai in milk for longer time, than it is mentioned in the recipe.
- Rasmalai will become chewy.
- Once done, add the warm saffron soaked milk over it.
- Sprinkle chopped pistachios over it and add the rose essence if using.
- Pour the remaining hot milk over the rasmalai , cover it loosely and let it stand in room temperature for 4 hours at least.
- Afterwards, you can keep the rasmalai in refrigerator.
Happy
0 %
Sad
0 %
Excited
0 %
Sleepy
0 %
Angry
0 %
Surprise
0 %
Average Rating